Excel allows you to lock cells in place and also merge them. This is often useful for adding titles to a sheet, that span multiple cells and for locking the column headers so they remain in place as you scroll down your table. In this article, I will teach you how to lock and merge cells. I am using the free version of Office 365 Excel for this example, but other versions will work just the same. I am also using the Student Information Dataset from Kaggle for this example.
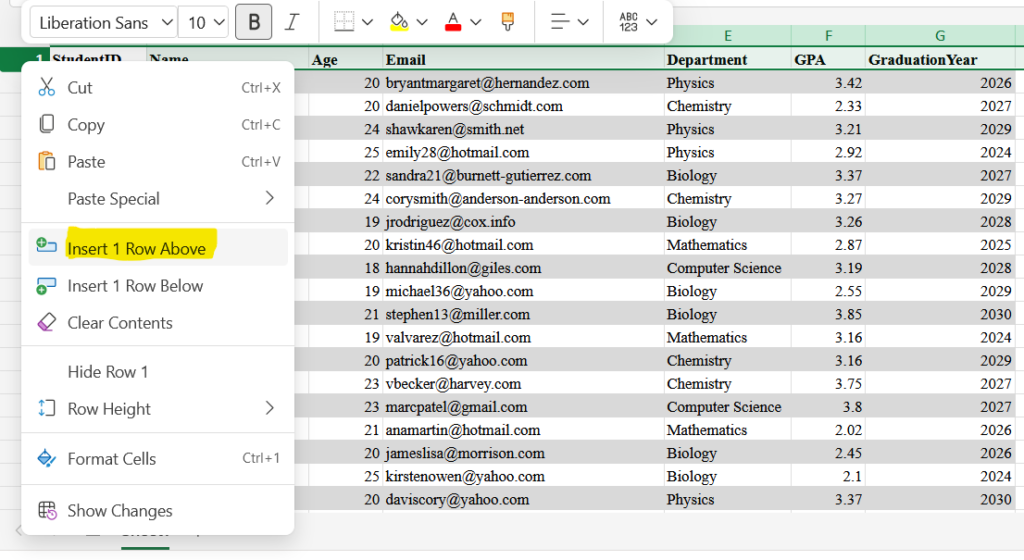
Let us say that I want to add a title to my table, that spans all the columns of the table, and is centered over them. First, I right click on the number of the first row and select “Insert 1 Row Above” to add a row where I can write my title.

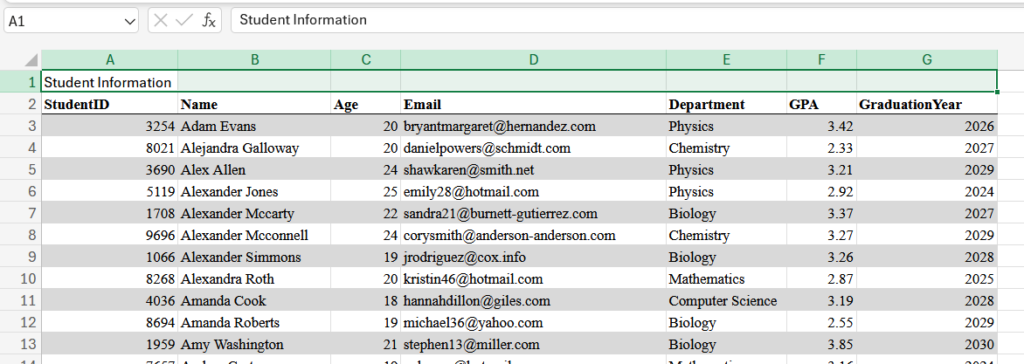
Once I have this row, I can write my title in the A1 cell. I will call it “Student Information.” After that, I hold the Shift key and tap the right arrow to select all the columns that comprise the table.

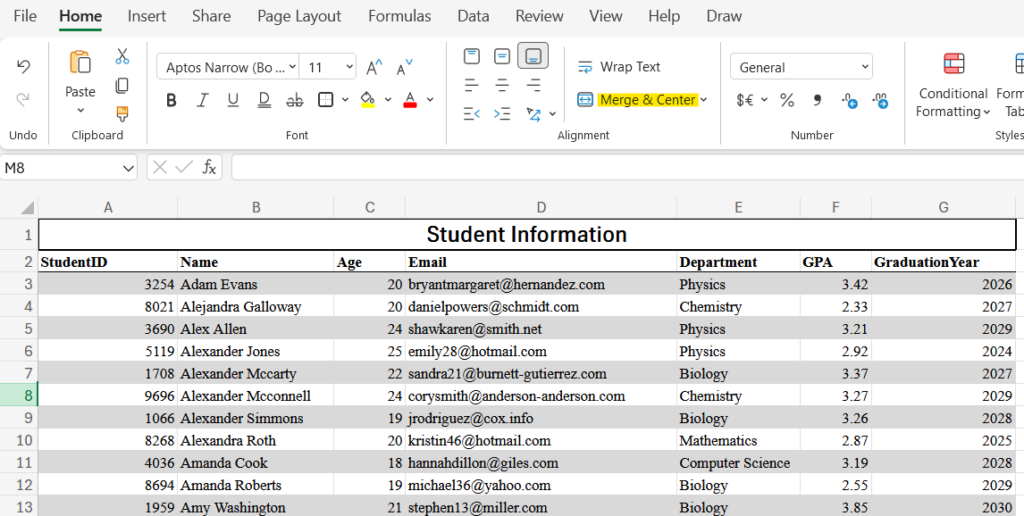
Then, I go to the “Home” tab in the ribbon and select “Merge and Center.” This will merge the cells and center the title. I also made it bold, chose a slightly larger font and put a border around it to make it more visually pleasing. These functions are also in the “Home” tab.

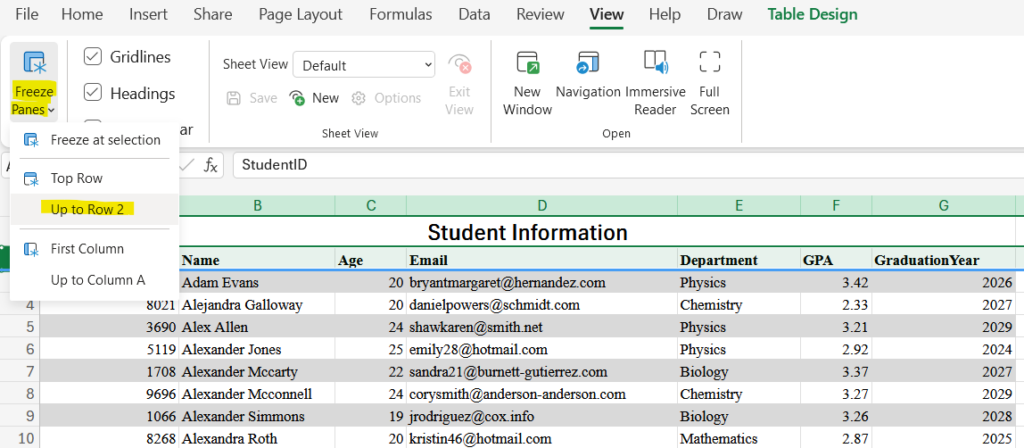
Now, I can lock rows 1 and 2 so they follow the table as I scroll down. To do this, I select the second row, then go to the “View” tab, click on “Freeze Panes” and then on “Up to Row 2.”

This locks up to row 2 and now when I scroll down the table, the title and column headers remain locked in place.


Leave a Reply